Rolling Brake Test
The first time my observer asked me to do a rolling brake test, I won’t lie — I had no idea what they were on about. I smiled, nodded, and drove for about a quarter of a mile quietly running through every driving term I’d ever learned. It was not my finest moment.
Here’s what I wish someone had explained before that drive:
- What a rolling brake test actually is — and why it belongs in every advanced drive, not just the assessment
- The feel-firm-feather technique, broken into three clear stages with the right speed targets
- The SLAP check for deciding exactly when to perform it safely and correctly
What Is A Rolling Brake Test?
A rolling brake test (RBT) is a moving brake demonstration used in advanced driving to confirm two things: that the brakes apply evenly and pull the car up in a straight line, and that the seatbelt’s inertia reel — the mechanism that locks the belt under sudden deceleration — engages correctly under firm braking. It’s performed from approximately 20 mph, reducing to around 5 mph, and is typically completed within the first 100 metres of a drive.
Why The Test Earns Its Place
It’s easy to treat the RBT as a ritual you perform to impress an observer and then quietly forget about. Before you dismiss it as a box-ticking exercise, there are two solid reasons it earns its place in every drive.
- Even braking: If the car pulls to one side under firm pressure, the brakes aren’t applying equal force to all four wheels. In an emergency stop, that same imbalance means the car won’t pull up straight — exactly when it needs to.
- Seatbelt inertia: The first time I actually felt my chest strap tighten during the test, I realised I’d been wearing a seatbelt for years without ever confirming it worked. If the inertia reel doesn’t engage, the belt won’t do its job when it counts.
Treat the RBT as a five-second diagnostic rather than a bit of showmanship for the observer. Done properly, it either confirms everything is working or flags something worth discussing with a mechanic before you’re travelling at 60 mph on a dual carriageway.
The SLAP Check — Choosing The Right Moment
Knowing how to perform the test is one thing. Knowing when to do it safely is what actually separates a competent application from a poor one. Before committing to the brake, I run a four-point mental check you can remember as SLAP — it takes three seconds, and it once saved me from doing the test on the approach to a bend.
| SLAP Check | Question to Ask | Example Pass | Example Fail |
| S — Safe | Is the road ahead and behind clear? | Open residential road | Car following close behind |
| L — Legal | Does the road allow a firm brake here? | Clear stretch, no restrictions | Junction or double yellow lines ahead |
| A — Achieve | Will this actually tell me something useful? | Normal dry road conditions | Wet or icy surface |
| P — Perception | How will other road users read this? | Clear road, no following traffic | Car tailgating or overtaking nearby |
The test should ideally happen within the first 100 metres of the drive. If road conditions don’t allow it straight away, wait — but do it early. Leaving it too long defeats the purpose of checking the car before you’re deep into a journey.
How To Warn Your Passengers Without Starting A Panic
Most drivers forget this step entirely — and then wonder why their passenger grabs the door handle and gives them a look that could curdle milk. My passenger did exactly that once, because I hadn’t said a word beforehand. After that, I started using the recommended script every single time.
Before applying the brakes, say this verbatim:
“I’m going to carry out a moving brake test, during which I’ll be applying the brakes very firmly. I’ll count three–two–one–zero, and on zero I’ll apply the brakes. Are you ready?”
The reason for doing this is as much practical as it is polite. An unprepared passenger might flinch, brace awkwardly, or yelp at exactly the wrong moment and break your concentration mid-test. The script sets expectations clearly, keeps the cabin calm, and signals to anyone watching from outside that the driver is in control.
The Feel-Firm-Feather Technique, Step By Step
This is the core of the test, and the part most worth practising until it feels completely natural. The technique works in three progressive stages, from approximately 20 mph down to 5 mph — without coming to a full stop.
- Feel — Apply brake pressure gradually. The pedal should begin to respond and the car should decelerate noticeably. You’re reading the baseline responsiveness of the brakes before committing to full pressure.
- Firm — Increase to firm, deliberate pressure. This is the peak of the application — maximum braking effort, short of locking the wheels. The seatbelt should tighten against your chest here, confirming the inertia reel is working.
- Feather — As speed drops towards 5 mph, ease off smoothly. Don’t release sharply or stomp to a complete halt. Taper the pressure out gradually until the car settles.
I found the feather stage the trickiest at first. There’s a temptation to either release the pedal too abruptly or just stomp and stop — and neither gives you useful feedback about how the brakes are actually performing. The goal is controlled, informative deceleration.
What Should Happen — And What To Listen For
After the test, take a moment to assess what the car actually did. The whole point is to gather useful information, so it’s worth taking a second to read the result honestly.
- Did the car pull straight? Any drift left or right under firm pressure suggests uneven braking — worth mentioning to a mechanic sooner rather than later.
- Did the seatbelt lock? You should have felt clear resistance from the chest strap. If it didn’t engage noticeably, the inertia reel deserves a closer look.
- Was the deceleration smooth? A pulsing or juddering sensation under firm braking can indicate warped discs or uneven pad wear.
Keep the tone calm and diagnostic. If something felt off, it’s a conversation for a garage — not a reason to pull over and ring 999.
The Seatbelt Inertia Check (Do This Before You Move Off)
Before pulling away — as part of the standard cockpit drill (the pre-drive check of controls, mirrors, and safety equipment) — you can test the inertia reel without the car moving at all. It takes five seconds and costs nothing.
- Click the belt in and sit naturally
- Give the chest strap a sharp, short tug
- The belt should lock immediately and resist the pull — then release the moment you ease off
If it doesn’t lock, the mechanism is worth having inspected. This check can live in the cockpit routine every single drive.
Offering The Test During An Advanced Driving Assessment
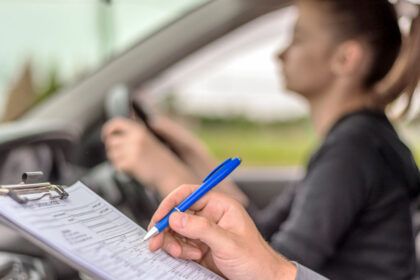
During an observed drive with an IAM or RoSPA examiner, offering the RBT proactively demonstrates that you understand vehicle safety checks as a genuine habit, not just a procedure you’ve memorised for the test. I offered mine within the first quarter mile of my session. The observer didn’t say much — but they made a note, and I’m fairly confident it was a good one.
If the opening section of the drive isn’t suitable — heavy traffic, no clear run — tell the examiner and perform the test at the earliest safe opportunity. Silence is the wrong response. A brief “I’ll hold off until the road clears” signals awareness and judgement, which is precisely what an advanced assessment is designed to measure.
If you’re working through an IAM RoadSmart associate programme, your observer will cover exercises like this across your sessions in your own car, on real roads — 6 to 12 sessions of practical, one-to-one guidance that makes techniques like this stick in a way no walkthrough ever quite manages.
Ready To Make This Second Nature?
The rolling brake test takes seconds. Doing it well — at the right moment, with the right technique, on a clear road, with a prepared passenger — takes deliberate practice and a repeatable approach.
- Run the SLAP check first: Safe, Legal, Achieve, Perception — three seconds before you touch the brake, every single time.
- Use the passenger script verbatim, especially with anyone who isn’t expecting a firm deceleration. They’ll understand why afterwards.
- Practise feathering out at 5 mph until it feels as natural as the firm stage — it’s the part most drivers rush or abandon too early.
- Apply it to unfamiliar cars too. A hire car, a company vehicle, any new set of wheels — a quick rolling brake check in the first mile is one of the most transferable habits from advanced driving to everyday life.
P.S. — If you’re working towards your IAM advanced test, getting exercises like the RBT into your muscle memory before your observer sessions begin will make each drive more productive. IAM RoadSmart’s associate programme puts you through exactly these situations, with a trained observer, in your own car — which is a very different experience to reading about it.