Most people who can parallel park didn’t learn it — they survived it enough times for it to stick. That’s a rough way to approach something this mechanical and this repeatable. Once you understand the reference points, parallel parking stops being guesswork and becomes a sequence you can run the same way every time.
Here’s what this guide covers:
- The exact starting position and three-move steering sequence UK drivers use on test and beyond
- Named reference points so you know precisely when to steer — no winging it
- A simple approach for staying calm, even when someone’s queued up behind you
What Even Is Parallel Parking (And Why Does It Feel So Hard)?
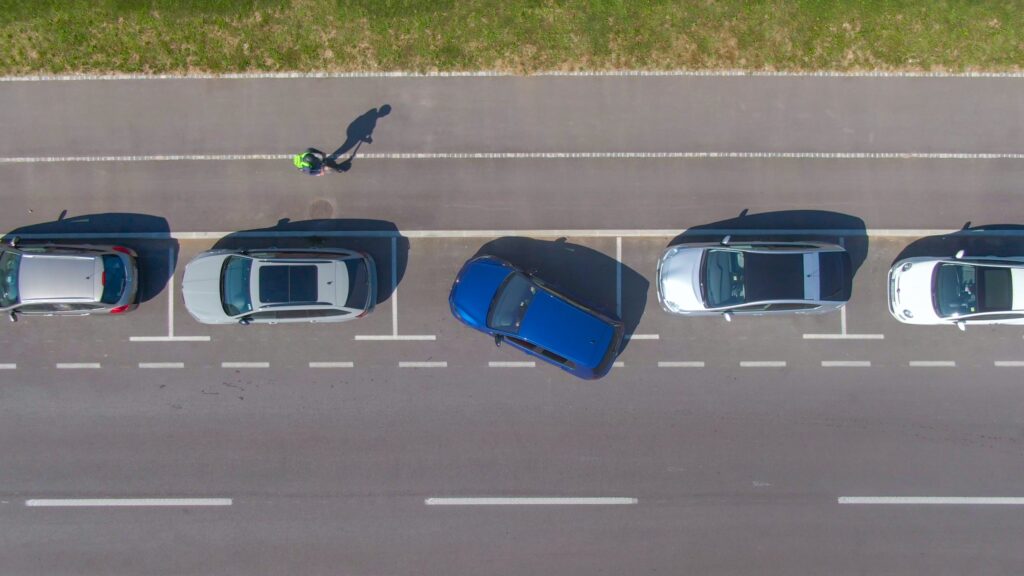
Parallel parking is reversing into a roadside space between two parked cars, finishing parallel to the kerb and in line with the flow of traffic. It’s simple enough to describe and genuinely frustrating to do, at least until the sequence becomes second nature.
It’s one of the manoeuvres the DVSA may ask you to perform on your practical driving test, alongside bay parking and pulling up on the right. The examiner picks just one on the day, and you won’t know in advance which — so if the test is on the horizon, there’s no real option to dodge this one quietly.
The reason it feels difficult is a mix of reversing (which flips your spatial instincts), blind spots, and the low-speed precision required to slot a 4–5-metre car into a 7–8-metre gap. When I first attempted it, I nearly clipped a wing mirror and backed over someone’s abandoned wheely bin. Once the reference points clicked, it became almost automatic.
Before we get into the mechanics, here’s the simple idea that holds the whole thing together: read the space (is it big enough, and what’s around you?), reverse using reference points (let the visual cues make the steering decisions for you), and refine your finish (almost every park ends with a small nudge forward or back — that’s intentional, not a sign of failure). Keep that in mind as you work through the steps below.
How Much Space Do I Actually Need?
Before you signal and slow down, you need to assess whether the space is worth committing to. This is the step most guides skim past — and it’s arguably the most important decision you’ll make before the whole thing starts.
The rule of thumb is that the space should be at least 1.5 times the length of your car. If your car is 4.5m long, that’s a minimum gap of roughly 6.75m. As a beginner, aim for 7–8m until your technique is reliable — the extra room makes each move significantly more forgiving.
To assess a space while moving:
- Drive slowly past before committing — a gap that fits roughly two cars is a dependable green light for most beginners
- Use your left indicator as you slow down to signal your intention to drivers behind
- If the space genuinely makes you wince, trust that instinct — there’ll be another one further along the road
Getting Into Position Before You Reverse
The setup is everything. Start wrong and the sequence falls apart — and then you’re doing an embarrassing shunt with the hazards blinking and three cars queueing patiently behind you.
Pull up parallel to Car A (the car in front of your target space), leaving roughly 0.5m between your two vehicles — about the width of an open car door. Align your rear bumpers so they’re roughly level with each other. This is your launch position.
Once in position, work through this checklist before moving an inch:
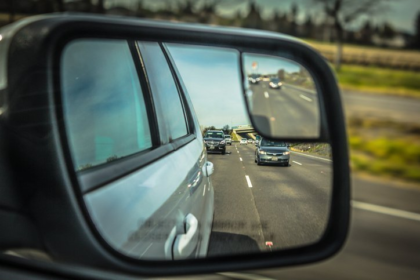
- Select reverse and carry out a full observation: check both mirrors, then look over your right shoulder into the blind spot
- Your reverse lights communicate your intent to approaching traffic without needing to re-indicate
- Try to steer only while the car is moving. Turning the wheel while stationary — known as dry steering — strains your tyres and steering components and is discouraged by instructors as poor practice. It’s worth knowing that examiners no longer record it as a fault in itself, but building the habit of steering on the move makes you a smoother, more coordinated driver and spares an older car’s steering. The test is marked purely on whether your steering is smooth, safe and under control
The Three-Move Steering Sequence
This is the core of the manoeuvre. Everything before this was setup; everything after is fine-tuning. The sequence works around three visual reference points — cues that tell you exactly when to make each steering move. Hit them in order, keep your speed at a walking pace, and the car does what it needs to do.
Move 1 — Steer Left Into The Space
Once your rear axle is roughly level with Car A’s rear bumper, apply two full pull-push turns of the wheel to the left and continue reversing slowly and continuously.
Watch your offside (driver’s) mirror — the front of your car should begin swinging away from Car A, out into the road. That’s exactly what you want. Keep the pace to a slow walk: speed at this stage removes your ability to react in time.
Move 2 — Steer Right To Correct
When your offside mirror shows your car angling toward the nearside rear corner of Car B (the car behind the space), counter with two full turns of right lock. This is the correction move — it swings the front of your car toward the kerb and straightens your angle of entry.
Keep reversing without stopping between moves, unless a hazard appears or you’ve genuinely lost your bearings.
Move 3 — Straighten Up Against The Kerb
As the front of your car clears Car A’s rear corner, apply full right lock again to bring the front fully into line with the kerb. Check your nearside (left) mirror — you’re aiming to finish 15–20cm from the kerb, roughly the spread of your fingers with your hand flat.
Once the car is parallel, straighten the wheel, nudge forward to centre yourself in the space, apply the handbrake, and select neutral. Done.
Reference Points That Work On Most Cars
Reference points turn the manoeuvre from something you feel into something you see. These three are consistent across most standard UK cars — your instructor may refine them slightly for your specific vehicle, but they’ll be close.
| Reference Point | What to Look For | What to Do |
| RP1 — Start of Move 1 | Your rear axle aligns with Car A’s rear bumper (check offside mirror while reversing) | Apply two full turns of left lock |
| RP2 — Start of Move 2 | Your car’s nose is aimed at Car B’s nearside rear corner (offside mirror) | Apply two full turns of right lock |
| RP3 — Start of Move 3 | Your front-left corner has just cleared Car A’s rear-right corner (nearside mirror + glance over left shoulder) | Apply full right lock to bring the front in |
One practical trick during early practice: some learners use a small piece of tape on the lower rear windscreen as a visual distance marker for the kerb. It feels a bit makeshift, but it’s a perfectly legitimate aid, and it trains your eye faster than almost anything else until the visual becomes instinctive.
The Most Common Parallel Parking Mistakes (And How To Fix Them)
Everyone makes these. The difference between someone who’s confident at parallel parking and someone who dreads it usually comes down to one thing: the ability to diagnose what went wrong and adjust the next attempt.
| Mistake | Fix |
| Starting too far from Car A | Stay within 0.5m — a wider gap throws off every reference point that follows |
| Reversing too fast | Aim for a slow walking pace throughout; speed destroys your correction window |
| Skipping the blind spot check | Build the right-shoulder check in before you begin reversing — every single time, no exceptions |
| Finishing too far from the kerb | You likely delayed Move 3; use your nearside mirror more actively in the final phase |
| Mounting the kerb | You probably over-locked on Move 1; ease off slightly on that initial left turn |
| Dry steering | Keep the car moving whenever you’re turning the wheel — even if you’re barely creeping |
Practising Until It Clicks
A quiet car park is a far better classroom than a busy road when you’re still building the muscle memory. Set up two traffic cones — or even cardboard boxes — roughly 7–8m apart to simulate Car A and Car B. Run the full sequence in isolation, no traffic, no pressure.
A few things that genuinely accelerate progress:
- Ask a friend to stand beside the car and narrate what they see — a second perspective picks up what mirrors miss, especially in the early runs
- Once you can complete the sequence cleanly and consistently, gradually reduce the gap to 6.5m
- After 10–15 solid repetitions, the reference points stop being something you have to consciously recall and start being something you simply see
The Hard Part Is The Audience, Not The Manoeuvre
Here’s the thing nobody says out loud: the manoeuvre itself isn’t the hard part once the sequence is in place. What makes people freeze is the imaginary tribunal — the car queued up behind them, the pedestrian watching from the pavement, the passenger in the front seat who just quietly inhaled.
None of them affects whether the car goes where you want it to. Once your reference points are locked in, the audience stops mattering to you as well.
You Know Enough To Go And Try It
Parallel parking is a sequence — predictable start, three named moves, and a consistent result when the reference points are used properly. Stop trying to feel your way through it and let the visual cues do the decision-making.
Here’s what to take with you:
- Read the space before you commit — 1.5x your car’s length minimum; 7–8m gives beginners real margin for error
- Get the setup right — 0.5m gap from Car A, rear bumpers aligned; this single step makes everything downstream easier
- Run the three moves in order — left lock into the space, right lock to correct, full right lock to straighten against the kerb; the reference points tell you when
- Steer on the move, not on the spot — it makes you a smoother driver and spares your car, even though it’s no longer marked on test
If you’re still building confidence, a couple of refresher lessons with a qualified instructor can dial in the reference points to your specific car far faster than solo practice alone.